Mediatrix 2102 Setup
- Plug the Mediatrix into the power supply and into the Ethernet connection. Install Unit Manager Network 3.2 application onto your PC. This application is available with the CD that is shipped with the Mediatrix 2102.
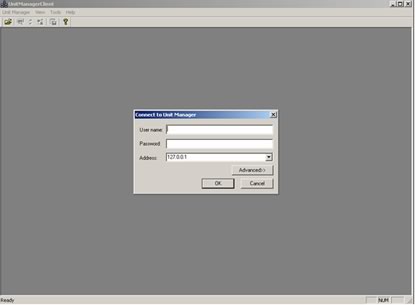
- Once you have finished installing the applications on your PC, start up Unit Manager Network 3.2 ('Programs' > 'Unit Manager Network 3.2' > 'Administrator'). You should see something similar to the screen pictured below.
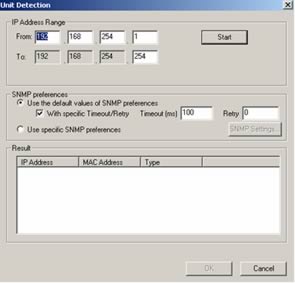
- You do not need to enter a Username or Password, just press OK. Once in the UnitManagerClient, go to 'Tree Item' > 'Autodetect' and type in the ip address of the device in the To and From fields (see below). If you do not know the IP Address, type in a suitable IP Address range.
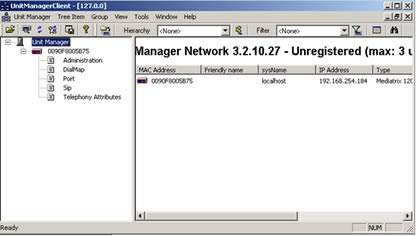
- Once the device has been found. Select it and press OK.
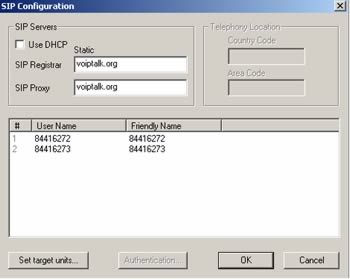
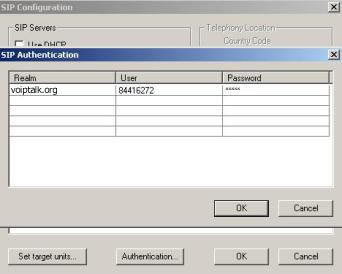
- Double-click on SIP from the screen above. Enter your VoIPtalk ID and SIP Registrar details (voiptalk.org) as shown in the example below.
- Select an account number (you can have up to two) and the Authentication button will become active. Click on the Authentication button.
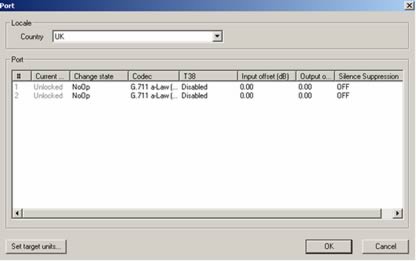
- For FAX transmission, double click on Port. Set up Country field as appropriate and disable T38 protocol.
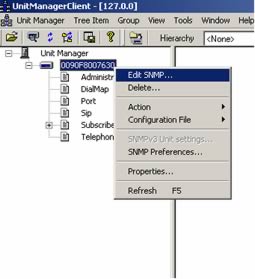
- If the IP address for the device is internal and behind NAT, do the following: Right click on the MAC address and choose Edit SMNP.
-
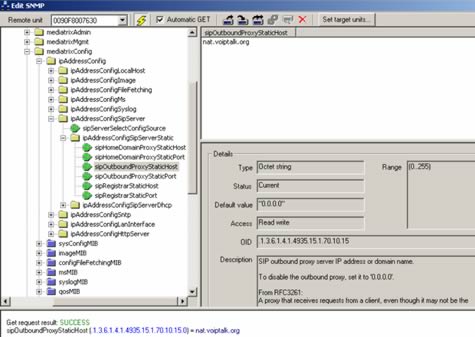
Change the following:
sipOutboundProxyStaticHost = nat.voiptalk.org
sipOutboundProxyStaticPort = 5065
- Save all your settings and reboot the device. You can test your configuration by dialling 902 and listening to the welcome message.
