3CX PBX - VoIPTalk Trunk Setup
Note: This guide will work with 3CX version V9.0 SP4 and higher. Please make sure all updates have been installed.
From the 3CX machine > Start > Programs > 3CX Phonesystem > Windows Management Console,
then login and on the left hand menu, choose 3CX Phone System Updates section.
-
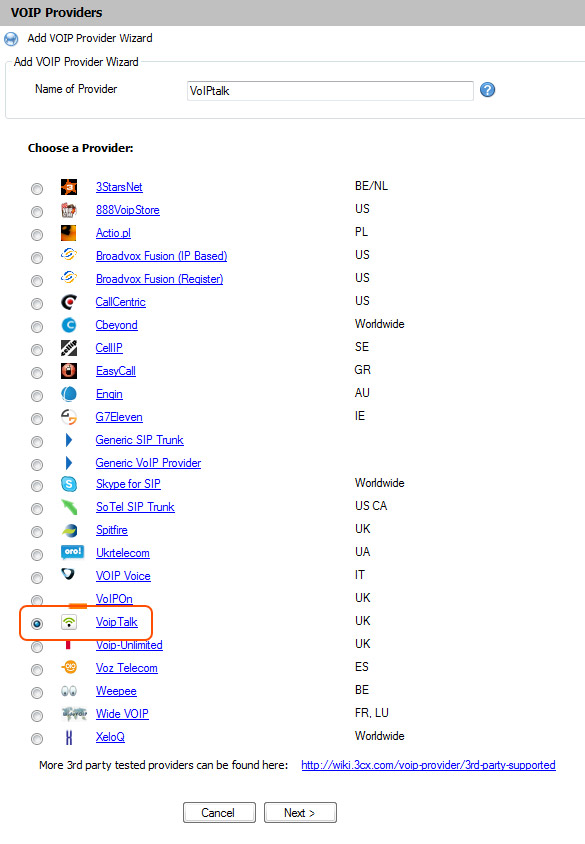
Click on "VOIP Provider" on the left hand menu and choose "Add Provider".
Type "VoIPtalk" in Name of Provider field.
Choose "Voip Talk" from the provider list and press Next.
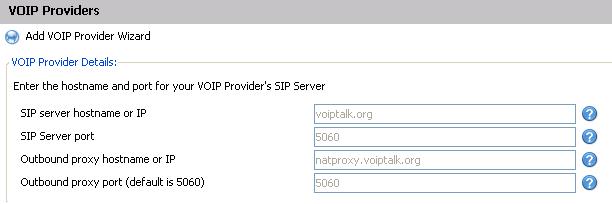
- On the VoIP Provider page, you will notice that Registrar and Proxy details are greyed out. Press Next.
-
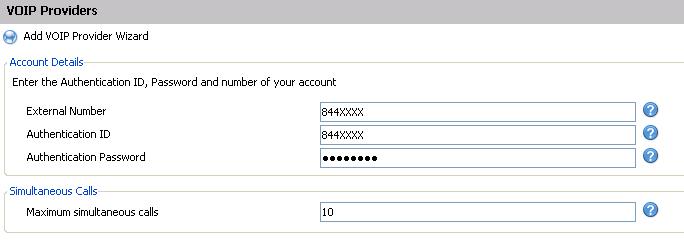
Enter your account details as follows and press next.
External Number = Your VoIPtalk ID
Authentication ID= Your VoIPtalk ID
Authentication Password = Your VoIPtalk password.
Maximum Simultaneous calls = Set any value eg. 10
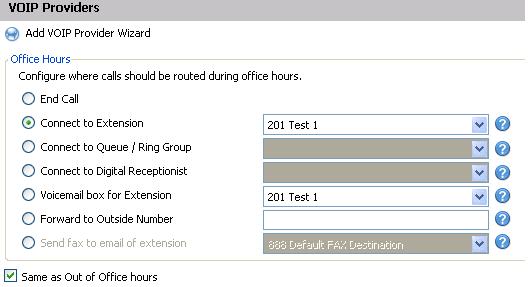
Note: There are call restrictions on VoIPtalk trunks. A standard VoIPtalk account can allow two simultaneous calls (incoming, outgoing or both). If you need more channels please contact sales@support.telappliant.com. - Select any extension as a default extension to receive calls on this trunk and press next.
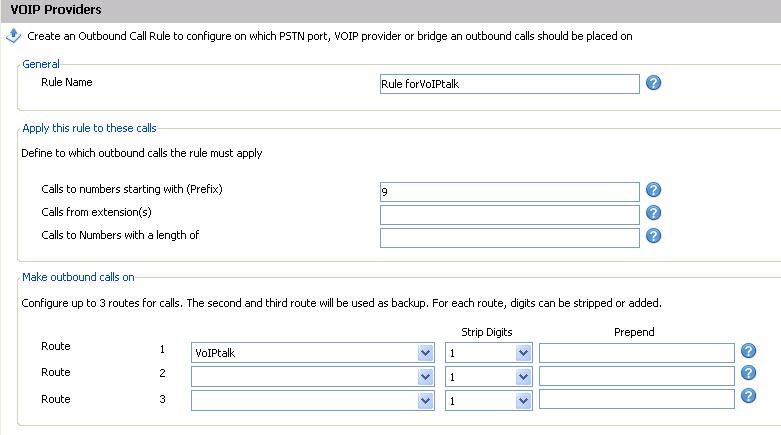
- Set up the outbound dialling rule to dial PSTN numbers over a VoIPtalk trunk as shown below. Note: The below example uses '9' as a prefix to define the numbers to which this rule will apply.
-
Setting up DIDs on a VoIPtalk trunk requires you to set-up routing for your DIDs on your account at www.voiptalk.org
- Go to www.voiptalk.org
- Click on 'Login' and enter your user name and password
- Click on your incoming number from the list
- Select “Route to a SIP PBX” from Configuration option drop down list
- Click "Select Option" and "Route to SIP PBX" button.
-
On the 3CX admin page, click on inbound rules on the left bar.
a. Enter your DID number in "DID/DDI Name" and "DID/DDI number/mask" fields

b. Select "VoIPtalk" on avaible ports list

b. Select your Office and Outside Office Hours routings.

    Press Apply and test incoming and outgoing calls.
