Configuration Of SIP Trunk With Trixbox For Use With VoIPtalk Setup
This guide will walk you through howto setup a Trixbox v2.6.2.1 SIP trunk.
-
Outgoing calls:
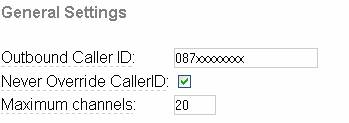
Go to PBX -> PBXSettings, select Trunks in the left hand menu. Select add SIP trunks, and in General Settings enter your PSTN incoming number received from voiptalk.org in the Outbound Caller ID field (with no spaces). - Check the Never Override Caller ID box, and set Maximum Channels to 20 or any limit you require (There maybe a channel limit on your VoIPtalk account depending on your VoIPtalk account tariff)
-
Leave the Outgoing Dial rules and the Outbound Dial Prefix field blank.
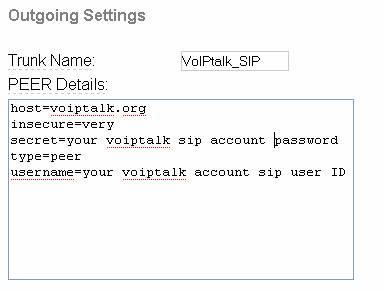
In Outgoing settings set trunk name to VoIPtalk_SIP, and PEER details ashost=voiptalk.org insecure=very secret=your voiptalk SIP account password type=peer username=your voiptalk account ID
- Leave Incoming Setting fields blank, and press Submit changes then select the orange bar at the top of the screen to reload the Configuration files.
-
Outbound Dialing Route:
Set the VoIPtalk_SIP as a dialing out trunk, click on Outbound Routes in the left hand menu and select the default 0 9_outside route on the right. Then select SIP/VoIPtalk_SIP in the Trunk Sequence drop down list 0.
Press Add, and Press the Submit button to save the changes. Then select the orange bar at the top of the screen to reload the Configuration files.
Note. By default this outbound rule is using prefix 9. You can change this in Dial Patterns as per your requirements.
You should be able to dial out on the VoIPtalk trunk. -
Incoming calls:
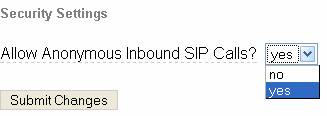
Go to PBX and click BPX Settings, then Trunks. Select the VoIPtalk trunk you created for outgoing calls. Scroll down the page and in the Registration section insert your VoIPtalk SIP user ID and password in the Register string. - Press Submit changes and select the orange bar at the top of the screen to reload the Configuration files. On the left hand side of the menu click on General Settings and select 'yes' in Allow Anonymous Inbound SIP Calls.
- Press Submit changes and select the orange bar at the top of the screen to reload the Configuration files.
-
Set inbound dialing route:
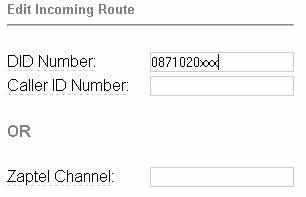
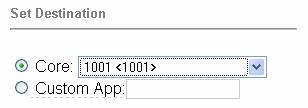
On the left hand side of the menu click on Inbound Routes and set your PSTN number as DID number, leave the Caller ID and the Zap channel field blank. - Select the option Signal RINGING and leave the Alert info field blank. In the Set Destination section select Extensions from the menu and Press Submit changes . Select the orange bar at the top of the screen to reload the Configuration files.
-
Set your Dialling plan for your VoIPtalk incoming number:
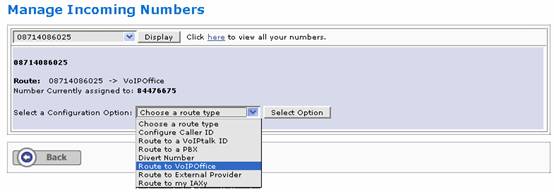
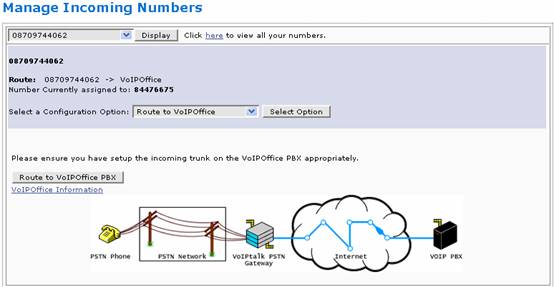
You need to set the routes for your incoming numbers on voiptalk.org to get incoming calls working. To do this go to http://www.voiptalk.org and click on my account tab page. Enter your email address and your VoIPtalk user password. (This is not the SIP account password). Then you will see the list of your voiptalk IDs and associated incoming numbers, click on the incoming number you want to use with VoIPtalk-SIP trunk on your Trixbox. This will bring you to 'Manage Incoming Numbers'. Select the Configuration Option, 'Route to VoIPoffice', and click the 'Route to VoIPoffice PBX' button. - Dial your incoming number and this should ring the selected extension on your Trixbox.
